My 3rd grade students are excited to be learning about 3D design and printing. They are following the “Let’s Learn Tinkercad” tutorials in Project Ignite. Once they have completed the tutorials the next step will be to start the design process. We are thrilled to be participating in the Star Trek Replicator Challenge this year. Their challenge will be to design a non-edible food related object for astronauts to 3D print in the year 2050. I can’t wait to see what my students come up with and will be sure to share photos once everything has been printed!
It’s the Most Wonderful Time of the Year
No not Christmas- it’s time for the Hour of Code! 
We live in a world surrounded by technology. And we know that whatever field our students choose to go into as adults, their ability to succeed will increasingly hinge on understanding how technology works. But only a tiny fraction of us are learning computer science, and less students are studying it than a decade ago.
That’s why our entire school is participating, for the third consecutive year, in on the largest education event in history: The Hour of Code. The Hour of Code is a nationwide initiative by Computer Science Education Week and Code.org to introduce millions of students to one hour of computer science and computer programming. Our Hour of Code is a statement that Village School is committed to teaching these foundational 21st century skills. During the month of December, every one of our students will be amongst over 100 million students worldwide spending one hour learning the basics of computer science coding. This Hour of Code is in addition to the programming literacy unit we do with all grade levels each year.
Wondering how my students will be spending their Hour?
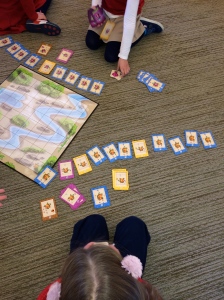
TK students will be playing Robot Turtles. In this “offline” board game students lay down cards to program their turtle to move forward, backward, left or right. The goal is for them to program their turtle to reach their gem in the center of the board. This game is a great way to introduce programming language and strategies to our youngest students.
K-2nd students will be using Code.org which offers an elementary school curriculum that allows students to explore the limitless world of computing. Each of the 20-lesson courses blend online, self-guided and self-paced tutorials. By the end of each course, students can create interactive games, stories, and art that they can share with anyone.
3rd grade students are currently participating in the Wonder Workshop Robotics Competition. Using the Wonder App, students utilize their sequencing and coding skills to program Dash and Dot to complete a set of missions. The final solutions will be shared with over 1200 participating schools worldwide.
4th grade began the Google CS First coding curriculum and are learning how to design an online game using Scratch– a program designed by MIT used to enhance programming skills through drag and drop commands.
5th grade students are approaching their 10th week of participation in the Lego Robotics Challenge. Students are working in teams of 2-4 and programming their Lego EV3 robots to complete a mission of their choice. Final programs will be shared during our Lego Robotics Showcase in February.
6th grade will be coding with Khan Academy learning about databases and spreadsheets, webpages and HTML or drawing with Code. Another option will be using Google’s Made with Code activities to create everything from LED dress designs to music mixes, to avatars. According to the Made with Code website, “From fashion to film, the things you love are Made with Code.”
Making and Innovating Through the Winter
We have been busy this trimester in the Innovation Studio. My goal has been to incorporate making activities in each grade level and as a result there have been some great projects! Here is a brief recap of some of my favorites:
First Grade- Monster Traps
Our first grade students participate in a Global Collaborative Project called Monster Exchange every year. The students draw monsters using Pixie and then I type the descriptions and send them to our partner school in Izmir, Turkey. Those students must redraw the monsters using only the descriptions and we do the same for their monsters. As an extension to the project I had my students design and build monster traps using recycled materials in our Innovation Studio. The students LOVED the project and ask me if they can make things every time they come to technology now!
Second Grade- Weather Inventions
Second grade students participate in a Weather Pals project every winter where they team up with other schools on the east coast and post the local weather, questions and answers about the weather data and film a weather broadcast that is shared via a project Wiki. This year we started the project early so that I could introduce Little Bits and have each group invent something that could help a person during a particular season. We had everything from leaf blowers to hot chocolate stirrers and I was blown away by the creativity that my students exhibited. We incorporated the inventions into our weather broadcasts so that they could be seen by everyone.
Third Grade- 3D Printed Candy Inventions
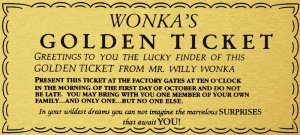
Third grade students read “Charlie and the Chocolate Factory” in their classrooms and as an extension for writers workshop their teacher had them invent 5 different types of candy that Willy Wonka might sell. To take it to the next level a parent that does marketing for a living came in and presented the steps for selling an invention to someone. The students then chose one of their inventions to “pitch” to Willy Wonka in a Shark Tank-like scenario. We decided it would be incredible to bring one of the candy inventions to life with 3D printing! Students just completed a 3 week TinkerCad tutorial session through Project Ignite and are now ready to design and print their candy inventions to share with family and friends.
TK and 5th Grade Buddies build Robots
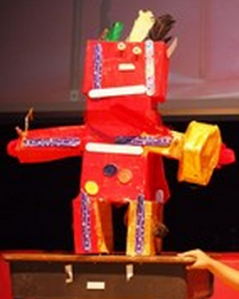
One of my favorite TK projects every year is the TK Robot project where the students design and build giant robots using recycled materials, paper mache, paint and other decorations. The students then make up a story to go along with their robot and every year without fail, the TK students say their robot can “do something” such as blow bubbles, make breakfast etc. This year I decided to make that dream a reality. Their 5th grade buddies interviewed each TK students about their robot to get a sense of it’s “personality”. They were then asked what they wanted designed for their robot that could either light up, make a noise, or make a small movement. After the interviews were complete the 5th graders got to work using motor, LEDs, buzzers, battery packs and anything else they needed to build the accessory. We had propellers that spun, hair bows that lit up, jetpacks on superpower capes and many other adorable additions. The TK students were so excited and proud to share what “their 5th grader” made for their robot during the all school assembly. I think a new tradition has begun!
Global Cardboard Challenge 2014
This year our third grade students participated in the annual Global Cardboard Challenge, inspired by the documentary Caine’s Arcade. Coinciding perfectly with our school-wide theme Think, Create, Innovate, our technology team has been busy transforming our traditional lab into an innovation studio and maker space. The Global Cardboard Challenge was our first “maker” project and the kids could not be more excited about it! We started by watching Caine’s Arcade 2 for some inspiration. Students then decided if they wanted to work with a partner or independently and sketched their design ideas on a brainstorming sheet. We spent 4 weeks building, tinkering, sawing and gluing. The final results are creative and most importantly the students have been saying things like, “I want to come to technology everyday!” We love the enthusiasm and will be inviting teachers to bring their students to check out all of the 3rd grader’s hard work. We can’t wait to do this every year!
Summer Minecraft Edu Club
I am just wrapping up a 5 week summer Minecraft club and this was my first time teaching with Minecraft Edu. Obviously Minecraft has been around for a while and I kept hearing about the excitement that always centers around it, but I had yet to experience it for myself. The beauty of starting with a summer club was that I did not necessarily have to worry about standards, just creativity and fun. I assumed that my students would really be into building and creating, but what I did not expect was how much I personally enjoyed it too! We all had such a good time in the class and built some amazing things together.
Here are some things I learned along the way:
- The first day is chaotic! I used the tutorial world for the first day even though most of the kids already knew what they were doing. I just let them navigate it for themselves which was tricky at times. Next time I am going to do a better job of letting them know what to expect in the tutorial world. I may even have them follow me through it.
- Establish “Community Rules”. Being respectful of property, each other and helping anyone in need is a good place to start.
- Start each class with a “Challenge” or “Mission” such as Build a shelter, Place a beacon, Design a ride, etc.
- Save weather and day/night for later in the class.
- There will always be a student that is amazing and knows way more than I do. Use them wisely! 🙂
- The fewer the guidelines the better (depending on your goal for the class). I gave students some guidelines for building their shelter and found them ignoring some of them. I realized that they were doing something better than I could have asked. Kids are amazing… don’t restrict them by trying to “help”.
- Watch out for the student that is completely lost. I asked many times throughout the class on Day 1 if anyone was having trouble and no hands were raised. In the last 5 minutes one of my students said, “I just have no idea how to play this or what I am supposed to do.” She had been doing such a good job of fooling me. I assured her we would sit down together the next day and I would show her everything.
- Build with the kids. They love seeing their teacher play too.
- Instead of requiring students to do something, start doing it yourself to attract their interest and you will find they will ask to help you. I started building a World Cup Stadium and by the end my students had figured out how to play a game with a slime ball. They wrote a book of rules and we played a world cup match together. The creativity was unbelievable!
- Highlight of the class for me- kids leaving me gifts and surprises in my house!


Joy and the Maker Movement
I recently read and article about fostering joy in students and the positive effect it has on their learning. Not surprisingly students experience joy when they are able to meet a challenge after given a series of lessons that involve active and engaged effort. Likewise, joy in learning occurs when students are given the freedom to work at their own pace, to determine how they want to learn, participate in play through their learning and finally collaborate and share what they learned with their peers. Most teachers know that if their students feel safe and happy in the classroom then they are more likely to be motivated and learn from not only their teacher, but each other. As I was reading the article I could not help but think of the maker movement and how it promotes all of these things (and more!). My colleagues and I are in the middle of transforming our traditional tech lab into an innovation space and even the small changes that we have made so far have elicited enthusiasm from our students. I can’t wait until next school year when it is officially complete and ready for tinkering!
The Hour of Code
After a 3 month hiatus while I was on maternity leave I came back to work just in time to celebrate Computer Science Education Week by participating in the Hour of Code. At our school we had every grade level participate in a coding activity of some sort. We made use of the resources that code.org sent out in addition to some of our own. I mentioned my feelings about coding in a previous post and could not be more thrilled that the Hour of Code has received so much support and attention.
How Village School students are celebrating the Hour of Code:
- TK – Introduction to Bee-Bots
- K – Play Robot Turtles board game
- 1st & 2nd Grades – Light-Bot Basics and Procedures
- 3rd Grade – Tynker Puppy Adventure & Lost in Space
- 4th & 5th Grades – Code.org mazes #1-20
- 6th Grade – Continuing our ongoing Lego Robotics Unit
Even President Obama has joined the movement!
I love watching our students leave the technology lab proudly wearing these stickers
For more coding resources visit our Symbaloo page and click the code button. Happy coding!
Making for Educators Week 2: Makey-Makey
This week was Makey-Makey week and I have to admit that this is one I have been looking forward to the most. I have not used Makey-Makey with my students yet, but my colleague did a week long summer camp class and it was a great success. Our challenge this week was to combine Makey-Makey with Scratch and design a project that we could incorporate into our curriculum. I started thinking about my second grade students and their fractured fairy tale unit that they do mid school year. Normally they come to the tech lab and illustrate their covers and pages for their stories. I would love to expand on it and have them design a story or game using Scratch that uses the characters from their fractured fairy tales. They can then use Makey-Makey to navigate through their Scratch programs. I designed a very simple version of what this could look like using the theme of Dusty Locks and the Three Horses.
I then hooked up Makey-Makey with a few bananas and before I knew it with the click of a banana Dusty Locks was having a conversation with the three horses.
As I was brainstorming and reflecting on the different projects I do with my students throughout the year I started thinking about my first graders when they participate in International Dot Day. We would create dots in Pixie and then import them into Scratch so that we can use Makey-Makey with them. The students could even make “squishy” dots to connect to their Scratch projects. Stay tuned for more Makey-Makey photos as I will be using it in one of my summer school classes this week and I look forward to the ideas my students will come up with!
For more Makey-Makey inspiration and resources please visit vstinkertown.weebly.com
Making for Educators Week 1: Squishy Circuits
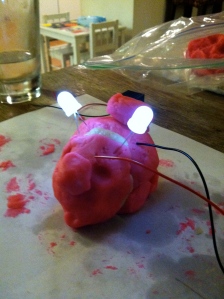
I just started a 6 week Making for Educators symposium and it is off to a great start. They introduced squishy circuits and we spent the week making homemade conductive and insulating dough and experimenting using the dough to connect components such as: battery packs, LED lights, buzzers and motors. The best part about the project was that my 7 year old son was immediately drawn to what I was doing and all but took over the design and creation of the different squishy circuit projects. We had so much fun together!
Here is what my son and I learned:
First we made the conductive and insulating dough. Big decision- what color should we make our dough?!
Now that we have our dough ready what should we make first?
We quickly discovered that we could not make all of lights work with our first design so we went back to the drawing board.
Next up- what animal should we make?
And we all know that a horse is not complete without a tail that lights up.
Finally we made a squishy pig:
We had so much fun and I can’t wait to introduce this to my students next year!
For those of you that are not familiar with squishy circuits check out these two resources:
Squishy Circuits at University of St. Thomas
Super Awesome Sylvia Show
Augmented Reality in the Classroom
I am spending my first day at ISTE 2013 in an augmented reality full day workshop. Wow the possibilities for using it in a classroom seem endless. We are using the Aurasma app as well as Aurasma Studio which are both free. We started by creating simple “Auras” with trigger images and animated overlays that were already in the Aurasma library. We then moved on to creating an Aura with a video overlay that we uploaded from our devices. I now have a public channel in Aurasma that can be followed by anyone that has downloaded the app to their mobile device. There are plenty of tutorials available within the app as well as on our instructor Dr. Scott Garrigan’s website. Happy creating!


